Well, I'm glad I had enough ammo stockpiled to see me through the last six months while I settled into our new home in the Houston area. It is good to be back to reloading again, but before I could do so, I had to build a new reloading bench, and thought I'd share some of the techniques I decided to incorporate.
Frame left. Notice top lag screws are countersunk so that I have a flat surface underneath the bench top. I also cut the wood as shown to maximize the under bench space for my cabinet. I still wanted all the vertical weight to be born wood-on-wood, as shown, instead of relying only on hardware to hold it together.
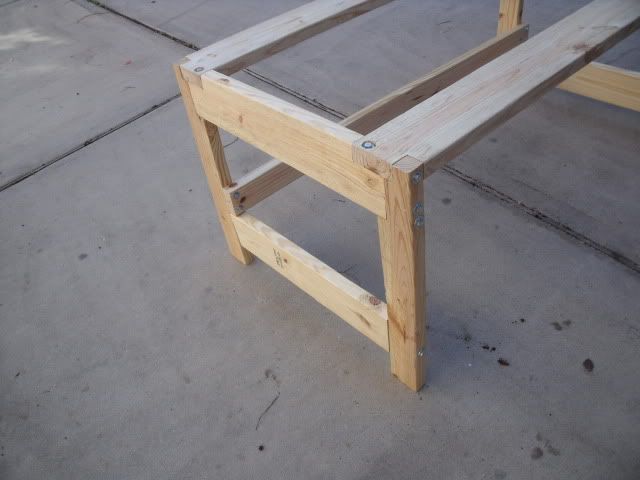
Frame right. I chose a 2x6 sideways to help resist torsion. Press torque is the primary stress.

Liquid nail on bottom 3/4 pine plywood
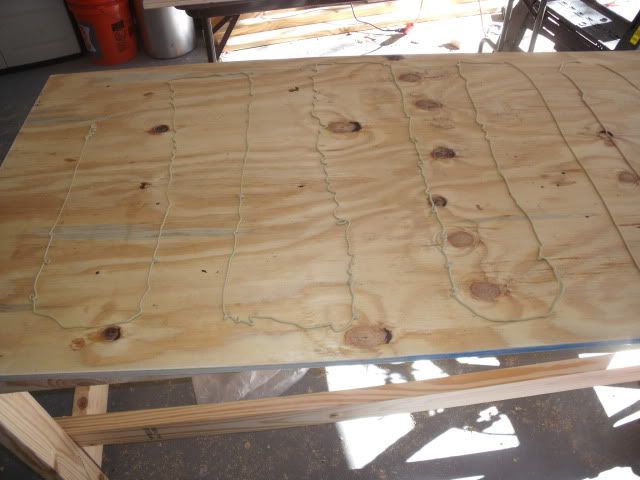
Top 3/4 in Oak plywood clamped to bottom 3/4 pine for liquid nail to set.

I cut 2 dado cuts in the bench top to mount T-Track. It lets me share the bench space to use multiple presses, a vise, bench grinder, etc. Multi-purpose bench top. I used an ordinary bench saw to make the cuts.


Next, I built a 5 drawer cabinet to go under the bench. These are the drawer fronts. All plywood was sealed with multiple coats of polyurethane because Houston weather is so humid.

The drawers are made using Blum Metabox full extension 330M drawer slides. They are 22" deep by 19 1/2 wide, rated for 75 pounds.


Mostly finished cabinet

I cut the 48 inch T-Track in half at an angle so that it fit flush in the dado cuts.

Mounted:

Finished bench.

Sense of scale for drawer size. Note that having full extension drawer slides instead of the more common 3/4 extension was important to me.

Lightweight mount for my Lee C press that I use to resize bullets.

A heavier mount is 1/16 steel plate backed by 3/4 plywood. This lets me countersink the bolt heads so the mount will sit flush on the bench.


